Relationship Based Access Control (ReBAC): The Ultimate Guide
Learn everything you need to know about ReBAC! We will examine ReBAC and cover its three highly-used models, explore the pros and cons, compare ReBAC with RBAC and ABAC, and show you how to implement ReBAC for your applications.
Relationship Based Access Control (ReBAC) has gained its popularity over years among startups to large enterprises. Yet, some large tech companies are already starting to use ReBAC as their leading access control model.
One of the biggest contributions to the popularity of ReBAC is definitely the Zanzibar whitepaper. In 2019 Google published whitepaper of its relationship based global authorization system called Zanzibar, which handles authorization for YouTube, Drive, Google Cloud and all of Google's other products.
In a short time Zanzibar - correlatively ReBAC - gained attention quickly. In fact some companies like Airbnb and Carta started to shift their legacy authorization structure to Zanzibar & ReBAC style systems.
Additional to shifts from large tech companies, ReBAC based solutions increased over the time. We're also one of them, building an open source authorization service that builds its core on top of ReBAC and Google Zanzibar.
Although ReBAC is best known for social networks due to its core concept being about the network of relations, it can be applied beyond that.
Unfortunately, we're seeing a significant number of businesses still trying to implement ReBAC-type permissions by using Role Based Access Control (RBAC) or Attribute Based Access Control (ABAC) models, which creates a huge technical debt and leads to security breaches over time.
In this post, we’ll examine ReBAC and cover three highly-used models of ReBAC that you shouldn't try to implement with RBAC or ABAC.
We will also look at the pros and cons of ReBAC, compare ReBAC with RBAC and ABAC, and show you how to implement ReBAC in your applications and services.
Table of Contents
- What is Relationship Based Access Control (ReBAC)?
- Common ReBAC Models
- Advantages and Drawbacks of ReBAC
- How does ReBAC differ from Role Based Access Control (RBAC)?
- How does ReBAC differ from Attribute Based Access Control (ABAC)?
- Implementing Relationship-Based Access Control (ReBAC)
- Summing Up
Let’s start with a quick intro about relationship-based access control and cover how it works.
What is Relationship Based Access Control (ReBAC)?
ReBAC is an access control model that defines permissions based on the relationships between entities and subjects of your system.
If we think of a simple document storage system, similar to Google Drive, which typically allows doc creators (or owners) to edit or delete the documents, which ensures that no ordinary user can make updates on a random resource.
In our document storage system, the Creator represents a relationship between the user (the subject) and the document (the entity). Therefore, if user X has a creator (owner) relationship with document Y (which means user X created the doc Y), then the system allows user X to edit or delete document Y without the need to explicitly define the 'editor' role.
Subject indicates the party that takes the action on resources. In most cases - likewise in this example - the subject will be a user, but it can also be another entity like a device, tenant or user set such as team members.
We’ll cover all these use cases, but since we started with creator - which is a form of ownership - let's continue with it and introduce our first ReBAC model: Ownership.
Common ReBAC Models
Data Ownership
Ownership can occur in many places across different applications. The general idea is, users or entities have absolute permissions on their own data.
Such examples are; users accessing their own profile settings in an application, tracking their own healthcare data, or viewing their own governmental information.
We mentioned the example “Users can edit posts they created”. We can easily achieve this functionality with ReBAC.
The biggest advantage of using relationship-based access control is that you can often utilize data already present in the application.
What I mean is that many applications already operate with a database containing a network of entities that have relationships with each other. We can clearly see this in relationship databases.

As an example from a simple blog application, when a user creates a post you can store its identity in the post table as owner. Sounds easy right ?
ReBAC combined with RBAC
It’s important to notice that access control models can be used together in such scenarios.
Although it's not reasonable to build ownership with roles and permissions. ReBAC ownership model works great with role based access control and it’s widely used.
Let’s give an example of deleting repository permission on Github. You can delete any repository or fork if you're either an organization owner or have admin permissions for the repository or fork.
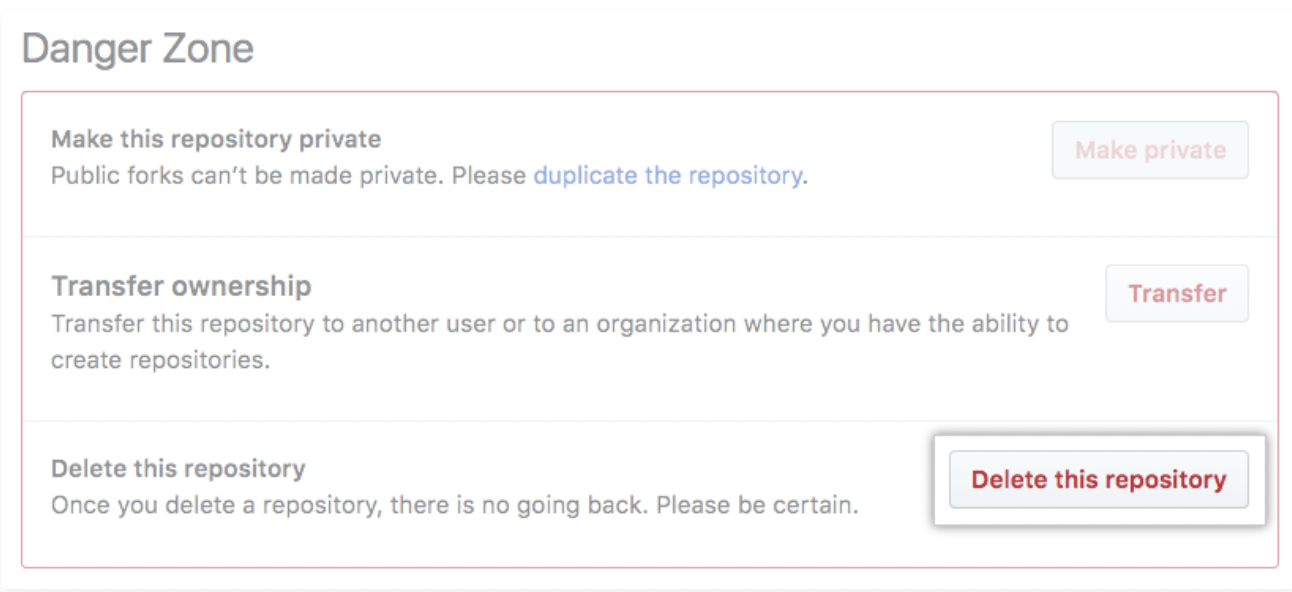
For performing a delete action, GitHub uses both RBAC and ReBAC. This combination indicates that either you need to have an admin role or you need to be owner of the organization to delete a repository.
Parent-Child & Hierarchies
Since being the owner of some resource can be also described as the parent of some resource, the parent-child model often be confused with ownership. Although they seem the same at first glance, they’re quite different.
Parent-child model is relevant with the nested relations of a child's resources. The general idea is granting parents access to perform actions on their children’s resources.
Think of a large business, in which departments have their own resources like files, documents, etc…
We want users to view resources if only they’re a member of the department. So this prevents different users from achieving other departments' files.
Notice that it’s not sufficient to say 'members can view department files' — instead, we need to specify the parent of the user as the department.

What if we want to add RBAC in this scenario ?
ReBAC combined with RBAC
Let's say users who have admin or manager roles can view all of the files organization-wide.
Generally, this is a scenario we wouldn’t prefer in real life, since giving 'god mode' to a specific user role breaks the principle of least privilege and it's a nightmare at scale systems.

When combining roles and relationship-based access control be careful about the priority of enforcement - access checks.
Most of the time you’ll need to check whether the user has admin or manager role first. If a user has it, then they can be authorized to perform the action. Unless the user doesn’t have one of these roles, then the system needs to check the parent child relation to decide.
User Groups & Teams
Grouping users helps to organize access control in a more structured way, especially at scale.
We examine the parent child relationship model with segmentation of resources (entities), we group resources (files) as in departments.
Groups model more focused on segmentation of users or user sets rather than segmenting the resources. In particular, this model ensures that the user has a privilege to access to do some action on a resource based on its group, team etc.
Github repository access would be a great example for group specific privileges.
Github enables you to give a team access to a repository or change a team's level of access to a repository in your repository settings.

Giving access to a team simply means members of that team can also access your private repository.
The enforcement workflow is the same as other models.
Most of the time you check whether the user has the relevant role or permissions, then you need to move on checking parent-child relation. Is the user still unauthorized ? if yes, then you need to check for each group the user belongs to.
Advantages and Drawbacks of ReBAC
Implementing Relationship-Based Access Control (ReBAC) can significantly improve how your organization manages access to resources. Let’s look into the pros and cons in a more detail.
Advantages
-
Eliminates the Need for Compute-Intensive Queries: ReBAC uses the relationships already present in your data, which means you can skip those heavy, time-consuming queries to figure out who has access to what. This makes your system faster and more efficient.
-
Creates Natural Linkage in Your Organization: Imagine your permissions naturally mirroring real-world relationships. For example, managers automatically have access to their team's documents. This alignment makes the system intuitive and easier to manage because it reflects the actual structure of your organization.
-
Enhanced Flexibility and Scalability: Organizations evolve, and so do their access needs. ReBAC adapts seamlessly to these changes without constant reconfiguration of roles and permissions. This is crucial in dynamic environments where organizational structures are always in flux.
-
Improved Security: Since permissions are based on relationships, the risk of misconfigured access rights drops significantly. This setup ensures that only the right people can access sensitive information, improving your organization's security.
-
Better Maintenance and Manageability: Updating permissions can often be as simple as updating relationships. This ease of maintenance reduces administrative overhead and keeps your permission system clean and efficient.
-
Reduces Human Error: By automatically deriving permissions from relationships, ReBAC minimizes the chances of manual errors that can occur when setting up or modifying access controls.
Drawbacks
-
Complexity in Implementation: Setting up ReBAC can be more complex than other models. It requires a deep understanding of your organization’s relationships and careful planning to model them accurately. This can make the initial setup more time-consuming and require sophisticated tools and expertise.
-
Performance Overhead: Managing and querying relationship data can introduce performance issues, especially in large, dynamic environments. Optimizing your database and using efficient queries is essential to keep things running smoothly.
-
Requires Comprehensive Testing: To ensure everything works correctly, ReBAC needs thorough testing, including scenario-based tests and policy checks to avoid misconfigurations. This level of testing is crucial to prevent access issues and ensure the system functions as intended.
How does ReBAC differ from Role Based Access Control (RBAC)?
Now, let's explore how ReBAC sets itself apart from other access control models. I want to start with Role-Based Access Control (RBAC).
Unlike traditional models, ReBAC operates beyond the confines of rigid roles or attributes, leveraging relationships to derive permissions.
This means with ReBAC you don't need to create a role or attribute for every permission requirement.
As an example, if you're a member of Group Y within your organization.
With RBAC, you'd need all the necessary roles to access resources exclusive to Group Y.
In ReBAC world since you have a relationship with Group Y lets you can directly get access to specific resources without needed to have roles or attibutes attached to your id, profile, etc.
Also some ReBAC cases are hard to obtain with roles, such as ownership.
Let’s look at the ownership scenario above from a Role Based Access Control (RBAC) perspective.
How we can create a permission or role that defines users to be able to edit posts they created?
It’s clear that we can’t achieve this with a single role.
A workaround solution would be assigning the “owner” role to the user when a post is created to differentiate it from other users. Plus, we need to add specific roles to each post to compare the user and owner roles.
This is the point where roles and permissions don't fit well, as opposed to ReBAC. As we mentioned this can be easily achieved through ReBAC with a simple database design.
How does ReBAC differ from Attribute Based Access Control (ABAC)?
To understand how ABAC and ReBAC differs, let's try to implement Parent-Child & Hierarchies scenario with using ABAC.
As mentioned, with ReBAC access is granted based on the relationship between the user and the department. Let's say if a user is a member of the HR department, they automatically get access to HR files.
This is straightforward – a user’s membership in a department directly determines their access rights.
To mimic this in ABAC, we would need to define attributes and create policies that consider these attributes.
More specifically, for each user, we would need attributes like 'Department=HR'. Each file or document would also have attributes, like 'DepartmentAccess=HR'.
Continuing, we would create policies like: "A user can access a file if the user's 'Department' attribute matches the file's 'DepartmentAccess' attribute."
Sounds simple enough, right? But here's where it gets tricky.
As our organization grows and evolves, so do our departments. This means our ABAC system needs to keep up, constantly updating with new attributes for every new department, role, or type of document.
Think about a user switching from the Marketing to the HR department – we'd need to change their access rights, and that's just one example.
And if we have a document that needs to be shared across multiple departments? Well, that's another layer of complexity.
Also this increase the computational overhead.
Every time someone requests access to a file, our system has to juggle and match all these attributes against our policies.
In a large organization with tons of users and resources, this can really put a strain on our system.
As a bottom line, a ReBAC system would handle these scenarios more naturally. A user's departmental membership would inherently define their access, without the need for constantly updating and evaluating a multitude of attributes and policies.
Implementing Relationship-Based Access Control (ReBAC)
ReBAC is an advanced method for managing access control by leveraging relationships among entities. Let's walk through an example scenario, design it at a high level, and then implement it using the Permify Go SDK.
High-Level Design
Example Scenario
Imagine you’re building a project management system where users can edit projects they created, and team leaders can access all projects within their team. This example will demonstrate how ReBAC can simplify access control.
Entities and Relationships
- Entities: Users, Projects, Teams
- Relationships:
- User -> Creates -> Project (ownership)
- User -> Belongs to -> Team (membership)
- Team -> Contains -> Project (parent-child)
Authorization Logic
- A user can edit a project if they created it.
- A team leader can access any project within their team.
Implementation with Permify
Step 1: Setting Up Permify
Start by running Permify as a Docker container to simplify setup and ensure consistency across environments.
docker run -p 3476:3476 -p 3478:3478 ghcr.io/permify/permify serve
This command starts the Permify service, making it accessible via its REST and gRPC interfaces. Docker ensures that the setup is isolated, portable, and consistent across different environments.
Verify the installation using Postman:
- Open Postman and create a new request.
- Set the request type to GET.
- Enter the URL
http://localhost:3476/healthz. - Send the request. A successful setup is indicated by a 200 OK response, confirming that Permify is operational.
Step 2: Define Relationships in Permify
Use Permify’s domain-specific language (DSL) to model the relationships and permissions:
entity user {}

entity project {
  relation creator @user
  relation team @team
}

entity team {
  relation member @user
  relation leader @user
}

action edit = creator
action view = team.member or team.leader or creator
Schema Components Explained
- Entities: Core objects like
user,project, andteam. These represent the main components within your system. - Relations: Define connections between entities. For example,
creatorandteamspecify the relationships of a project to a user and a team, respectively. These relationships help determine who has access to what. - Actions: Permissions like
editandviewspecify what users can do based on their relationships. Actions define the possible interactions users can have with entities, depending on their roles and relationships.
This schema sets up a basic structure where users can create projects and belong to teams. Projects are linked to their creators and teams, and permissions for viewing and editing are based on these relationships.
Step 3: Setting Up the Permify Go SDK
Installing and configuring the Permify Go SDK is essential for integrating Permify into your Go application. The SDK provides the necessary tools to interact with the Permify API, allowing you to define schemas, write relationships, and perform access checks programmatically.
Installing the Permify Go SDK
First, install the necessary package:
go get github.com/Permify/permify-go-sdk
Initializing the Permify Client
Next, initialize the Permify client in your application. This involves setting up the connection to the Permify service and preparing to interact with it.
import (
  "context"
  "log"
  "time"

  v1 "github.com/Permify/permify-go/generated/base/v1"
  permify "github.com/Permify/permify-go/v1"
  "google.golang.org/grpc"
  "google.golang.org/grpc/credentials/insecure"
)

var client *permify.Client

func setupPermifyClient() {
  var err error
  client, err = permify.NewClient(
    permify.Config{
      Endpoint: "localhost:3478", // Endpoint of your Permify service
    },
    grpc.WithTransportCredentials(insecure.NewCredentials()), // Insecure credentials for development
  )
  if err != nil {
    log.Fatalf("Failed to create Permify client: %v", err)
  }
  initPermifySchema()
}
Explanation:
- Permify Client Initialization: The
NewClientfunction initializes the Permify client by connecting to the Permify service endpoint. - Endpoint Configuration: The endpoint specifies the address of your Permify service. Replace
"localhost:3478"with your actual service address if different. - gRPC Configuration: The SDK uses gRPC for communication. The
WithTransportCredentialsfunction configures the client to use insecure credentials, which is suitable for development environments. For production, secure credentials should be used.
Writing the Schema
After initializing the client, you need to define and write your schema to the Permify service. This involves specifying entities, relationships, and actions as previously defined.
func initPermifySchema() {
  ctx, cancel := context.WithTimeout(context.Background(), 10*time.Second)
  defer cancel()

  schema := `
  entity user {}

  entity project {
    relation creator @user
    relation team @team
  }

  entity team {
    relation member @user
    relation leader @user
  }

  action edit = creator
  action view = team.member or team.leader or creator
  `
  sr, err := client.Schema.Write(ctx, &v1.SchemaWriteRequest{
    TenantId: "t1",
    Schema:   schema,
  })
  if err != nil {
    log.Fatalf("Failed to write schema: %v", err)
  }
  log.Printf("Schema version %s written successfully", sr.SchemaVersion)
}
Explanation:
- Schema Definition: The schema is defined as a string, following the Permify DSL.
- Schema Write Request: The
Schema.Writemethod sends the schema to the Permify service, specifying the tenant ID and the schema string. - Context Management: A context with a timeout is used to manage the request duration, ensuring it does not hang indefinitely.
Step 4: Store Relationships and Permissions
After defining the schema, the next step is to store the relationships and permissions. This is done by writing data tuples to the Permify service.
func storeRelationships() {
  ctx, cancel := context.WithTimeout(context.Background(), 10*time.Second)
  defer cancel()

  _, err := client.Data.Write(ctx, &v1.DataWriteRequest{
    TenantId: "t1",
    Metadata: &v1.DataWriteRequestMetadata{
      SchemaVersion: "your-schema-version",
    },
    Tuples: []*v1.Tuple{
      {
        Entity:   &v1.Entity{Type: "project", Id: "1"},
        Relation: "creator",
        Subject:  &v1.Subject{Type: "user", Id: "user1"},
      },
      {
        Entity:   &v1.Entity{Type: "project", Id: "1"},
        Relation: "team",
        Subject:  &v1.Subject{Type: "team", Id: "team1"},
      },
      {
        Entity:   &v1.Entity{Type: "team", Id: "team1"},
        Relation: "leader",
        Subject:  &v1.Subject{Type: "user", Id: "user2"},
      },
      {
        Entity:   &v1.Entity{Type: "team", Id: "team1"},
        Relation: "member",
        Subject:  &v1.Subject{Type: "user", Id: "user3"},
      },
    },
  })
  if err != nil {
    log.Fatalf("Failed to write data tuples: %v", err)
  }
  log.Println("Data tuples written successfully")
}
Explanation:
- Data Tuples: These represent the relationships between entities, defining who can access what based on their roles and relationships.
- Writing Data: The
Data.Writemethod sends these relationships to the Permify service, associating users with projects and teams as defined.
Step 5: Perform Access Checks
To enforce the access control rules, perform access checks to determine if a user has the necessary permissions to access a specific resource.
func checkPermission(username, permission string) bool {
  ctx, cancel := context.WithTimeout(context.Background(), 5*time.Second)
  defer cancel()

  checkResult, err := client.Permission.Check(ctx, &v1.PermissionCheckRequest{
    TenantId: "t1",
    Entity: &v1.Entity{
      Type: "project",
      Id:   "1",
    },
    Permission: permission,
    Subject: &v1.Subject{
      Type: "user",
      Id:   username,
    },
    Metadata: &v1.PermissionCheckRequestMetadata{
      SchemaVersion: "your-schema-version",
    },
  })
  if err != nil {
    log.Printf("Failed to check permission '%s' for user '%s': %v", permission, username, err)
    return false
  }
  return checkResult.Can == v1.CheckResult_CHECK_RESULT_ALLOWED
}
Explanation:
- Permission Check: The function checks if a user has the specified permission (
editorview) for a project. ThePermission.Checkmethod queries the Permify service to verify the user's access rights. - Context Management: A context with a timeout ensures that the permission check does not hang indefinitely.
Running the Application
- Start the Permify Server: Ensure your Permify server is running and accessible at the specified endpoint.
- Run Your Go Application: Execute your Go application to test the implementation.
go run main.go handlers.go permify_client.go
For more detailed guidance, refer to the Permify documentation. This will help you set up and optimize your ReBAC implementation effectively.
Summing Up
We went through 3 common relationship based access control models and tried to explain their structure with basic real world examples.
We contrast ReBAC with Role-Based Access Control (RBAC) and Attribute-Based Access Control (ABAC), highlighting the challenges and inefficiencies of using RBAC or ABAC to replicate ReBAC's model, especially in large organizations
As I mentioned we're building an open source authorization service called Permify, designed and structured as a true ReBAC (Relationship-Based Access Control) solution.
If you want to build ReBAC based robust authorization systems, we can help. Check out our open source repository or join our Discord community to learn more!